What Happens During a Labrador TPLO Operation
Hearing that your beloved Labrador has torn their cranial cruciate ligament (CCL) and needs surgery can feel like a punch to the gut. The thought of your vibrant, energetic companion going under the knife for a complex procedure like a Tibial Plateau Leveling Osteotomy (TPLO) is naturally scary and leaves many owners wondering exactly what happens. This guide is here to walk you through every step of the TPLO operation, from understanding why it's necessary to what happens in the operating room and the immediate aftermath, so you feel more prepared and less overwhelmed.
Understanding the Cruciate Ligament Tear in Labradors
Before we dive into the specifics of the surgery, it’s really helpful to understand exactly what a cruciate ligament tear means for your Labrador and why TPLO is often the recommended solution. Many people compare it to an ACL tear in humans, and while there are similarities, a dog's knee anatomy is quite unique, especially in a large, active breed like a Labrador.
The Anatomy of a Labrador's Knee and the CCL
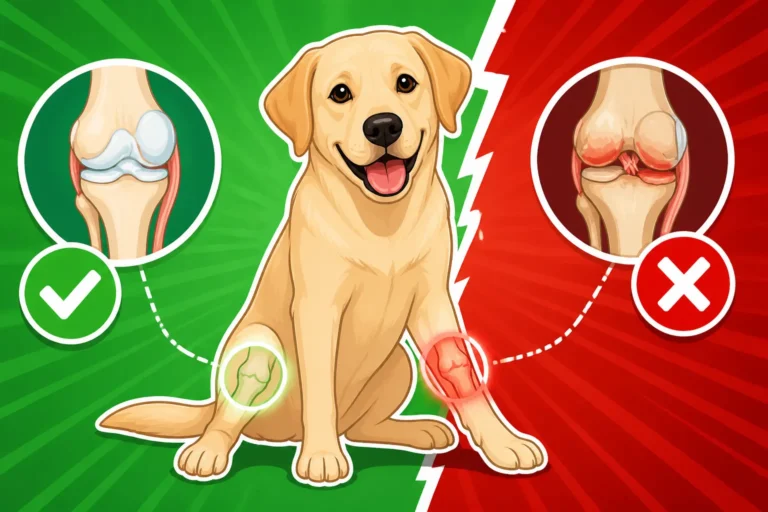
Your Labrador's knee, or stifle joint, is a marvel of engineering, allowing for all those joyful leaps, runs, and retrieves. It's a complex hinge joint that connects the thigh bone (femur) to the shin bone (tibia). Within this joint are two crucial ligaments known as the cranial cruciate ligament (CCL) and the caudal cruciate ligament. The CCL, in particular, is vital for stabilizing the knee, preventing the tibia from sliding forward relative to the femur and limiting excessive internal rotation of the joint. Think of it as the main guy holding everything together during movement.
In Labradors, due to their size, activity level, and sometimes genetic predispositions, this ligament can be under immense strain. Unlike acute trauma often seen in human ACL tears, canine CCL tears frequently develop over time through degenerative processes, often starting as a partial tear before progressing to a full rupture. This slow breakdown means the knee has been unstable for a while, leading to inflammation and discomfort, even before a dramatic lameness occurs.
Common Causes and Signs of a Torn CCL
While an enthusiastic jump or a sudden turn during play can be the "final straw" for a CCL, it's usually not the sole cause. Genetics, conformation (the way your dog is built), weight, and even chronic inflammation play significant roles. Labradors are among the breeds commonly affected, and if one knee goes, there's a higher chance the other will follow within a year or two. This is because the underlying issues often affect both knees, and the compensatory strain on the "good" leg can accelerate its demise.
Recognizing the signs of a torn CCL is crucial. Initially, you might notice a subtle lameness that comes and goes, especially after exercise. Your Labrador might sit with one leg extended out to the side rather than tucked neatly under their body – this is often called the "cruciate sit." As the tear progresses, the lameness becomes more pronounced, leading to toe-touching or complete non-weight-bearing. Swelling around the knee, muscle atrophy in the affected leg (due to disuse), and a general reluctance to bear weight on the limb are also strong indicators. If you observe these symptoms, a prompt veterinary visit is essential to confirm the diagnosis and discuss treatment options like TPLO. You might even want to read more about specific signs like Cruciate Ligament Tears in Labradors.
Preparing Your Labrador for TPLO Surgery
Once the diagnosis is made and TPLO is chosen as the path forward, the preparation phase begins. This can feel overwhelming with all the appointments, instructions, and the general anxiety about your dog going through a major surgery. However, being diligent in these pre-operative steps is vital for the best possible outcome.
Pre-surgical Diagnostics and Consultations
Your veterinary team will conduct a thorough pre-surgical workup. This typically includes blood tests to assess your Labrador's overall health, kidney and liver function, and ensure they can safely metabolize anesthesia. Chest X-rays might also be performed to check heart and lung health, especially important for larger breeds. The orthopedic surgeon will review all diagnostics, discuss the specifics of the surgery, and meticulously measure your dog's leg from X-rays. These measurements are crucial for determining the precise angle of the cut and the size of the implant needed during the TPLO procedure. Don't hesitate to ask every question you have during this consultation; it's their job to make you feel informed and comfortable.
Part of this preparation also involves understanding the financial aspect. TPLO surgery is a significant investment. Discussing costs, payment plans, and pet insurance coverage is critical. Many responsible pet owners find that having a policy from providers like Healthy Paws can significantly ease the burden of unexpected veterinary expenses, especially for major surgeries. Understanding your coverage beforehand can prevent added stress during an already challenging time.
At-Home Preparations and the Day Before
In the days leading up to surgery, your main job is to keep your Labrador calm and prevent any further injury. Keep walks short and on a leash, avoiding any rough play or sudden movements. On the evening before surgery, you'll typically be instructed to withhold food after a certain time, often midnight, to ensure your Labrador's stomach is empty for anesthesia. Water is usually allowed until the morning of the surgery, but always follow your vet's precise instructions. An empty stomach minimizes the risk of aspiration (inhaling vomit) during anesthesia, which can be a serious complication.
It's also a good idea to create a comfortable, quiet recovery space at home. This might involve setting up a crate or a small, confined area with soft bedding where your Labrador can rest undisturbed after coming home. Think about what your dog will need access to without putting strain on their recovering leg – water bowls at an appropriate height, easy access to a potty area, and no stairs if possible. Preparing your home in advance will make the first few days post-surgery much smoother for both you and your furry patient.
The TPLO Surgical Procedure Explained Step-by-Step
This is often the part that owners are most curious and anxious about. The TPLO procedure is a specialized orthopedic surgery that aims to stabilize the knee by changing the angle of the top of the tibia. It's not about repairing the torn ligament itself, as the ligament often has poor healing potential. Instead, it reconfigures the biomechanics of the knee so that the thrust created when your dog bears weight no longer causes the tibia to slide forward.
Anesthesia and Surgical Site Preparation
On the day of surgery, your Labrador will be admitted to the veterinary hospital. The first crucial step is the administration of anesthesia. A dedicated veterinary anesthesiologist or technician will closely monitor your dog's vital signs throughout the entire procedure, including heart rate, blood pressure, oxygen levels, and temperature. This meticulous monitoring is essential for safety, especially with breeds prone to certain conditions or those undergoing long surgeries. They will ensure your Labrador is deeply asleep and pain-free.
Once under anesthesia, the surgical site is meticulously prepared. This involves shaving a large area around the knee joint and then thoroughly cleaning and sterilizing the skin with antiseptic solutions. This rigorous preparation significantly reduces the risk of infection, which is a paramount concern in any orthopedic surgery. Your Labrador will also be positioned carefully on the operating table to allow the surgeon optimal access to the knee.
The Bone Cut and Plate Fixation
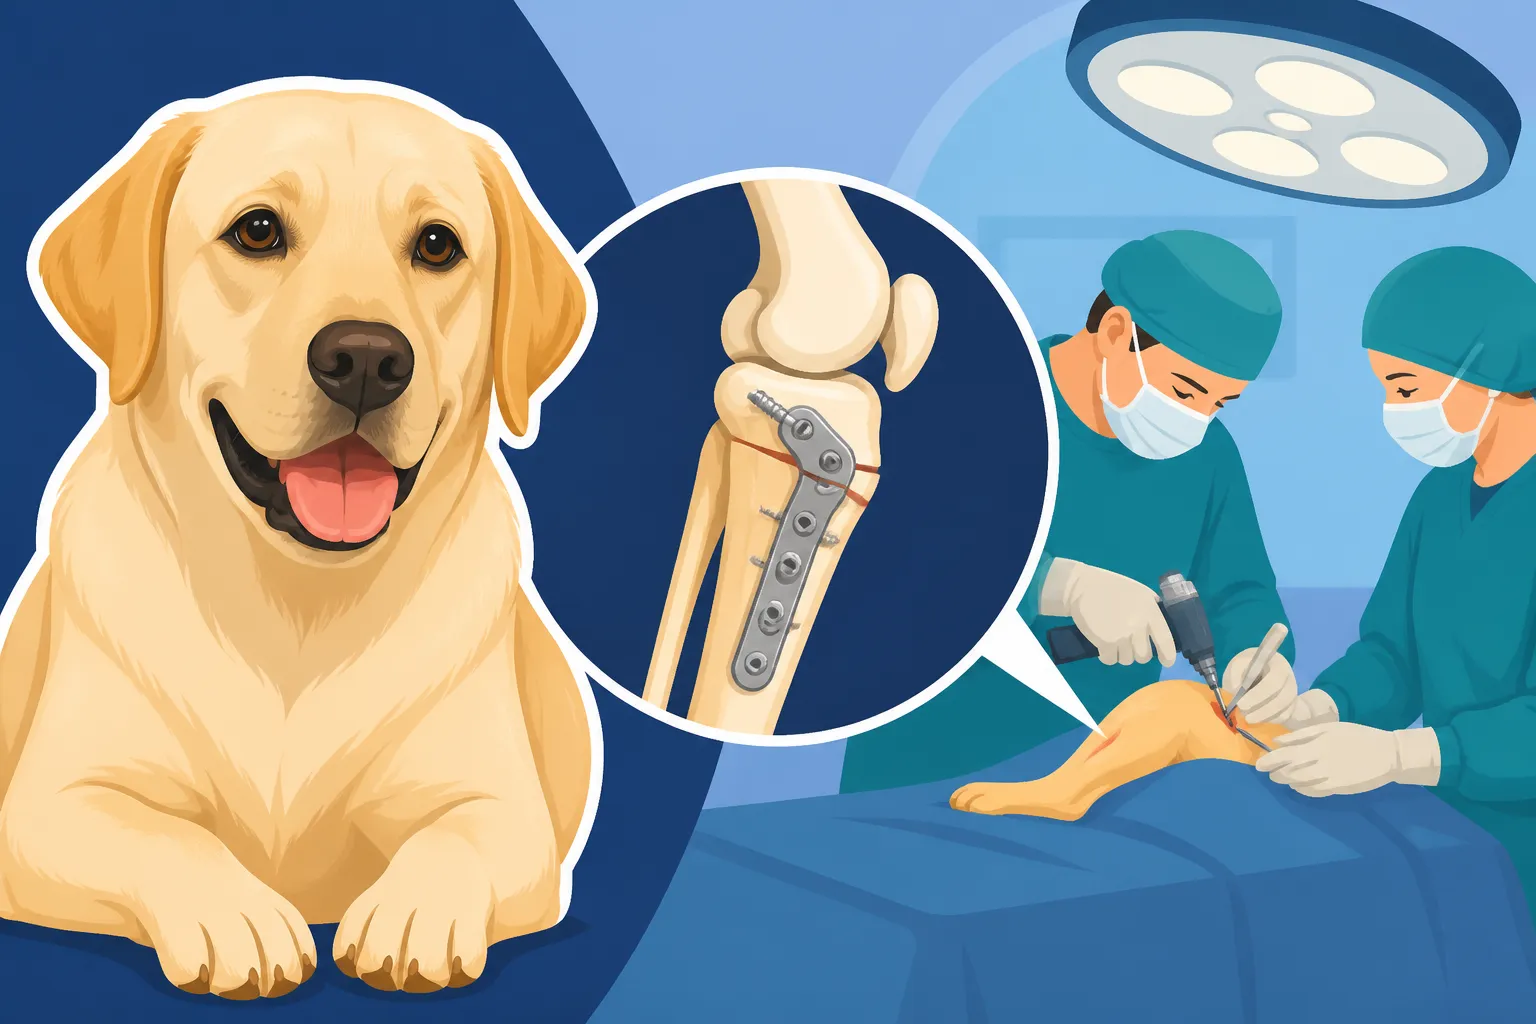
Now for the heart of the TPLO procedure. The orthopedic surgeon will make an incision to access the stifle joint. While the torn CCL itself is usually removed (it's often frayed and non-functional), the primary focus is on the tibia. Using specialized instruments and guided by the pre-operative measurements, the surgeon performs a curved cut (an osteotomy) on the top portion of the tibia, known as the tibial plateau. This cut essentially separates the top part of the bone.
Once the cut is made, the surgeon rotates the tibial plateau to a new, specific angle. The goal is to create a flatter surface, typically around 5 degrees, so that when your Labrador stands and puts weight on the leg, the forces that previously caused the tibia to slide forward are neutralized. This rotation essentially eliminates the need for the torn CCL. The rotated bone segment is then permanently secured in its new position using a specialized stainless steel or titanium bone plate and screws. These implants are designed to provide strong, stable fixation, allowing the bone to heal in its new configuration. The precision involved in this step is why TPLO is performed by experienced orthopedic specialists.
Post-Surgery Monitoring and Immediate Recovery
After the bone is stabilized with the plate and screws, the surgical site is carefully closed in layers. Your Labrador will then be moved to a recovery area where the veterinary team continues to monitor them closely as they wake up from anesthesia. The immediate post-operative period is critical for pain management and ensuring a smooth emergence. It’s common for dogs to be a bit groggy, disoriented, or even whimper softly as the anesthetic wears off, but the team will be there to provide comfort and manage any discomfort.
Many clinics specialize in ensuring patients wake up in a low-stress environment. The recovery process truly begins the moment the surgeon finishes, and constant attention to pain levels, incision integrity, and overall well-being is paramount. For pet owners concerned about the financial implications of such specialized care, particularly around potential complications, providers like Healthy Paws can offer peace of mind, knowing that a significant portion of these costs could be covered.
Immediate Post-Operative Care and What to Expect
The minutes and hours immediately following the TPLO surgery are crucial for your Labrador's comfort and the initiation of a successful recovery journey. Your vet team will be diligently managing pain and monitoring for any immediate complications before your dog is cleared to come home.
Pain Management and Hospital Stay
After a major surgery like TPLO, comprehensive pain management is a top priority. Your Labrador will receive a combination of pain medications, often including opioids, non-steroidal anti-inflammatory drugs (NSAIDs), and local anesthetic blocks, to keep them as comfortable as possible. This multi-modal approach targets pain from different angles, providing effective relief. The veterinary staff will continuously assess their pain levels and adjust medication as needed. It's not unusual for a Labrador to stay in the hospital for one to three nights following TPLO. This allows the veterinary team to manage initial pain effectively, monitor the incision site for any signs of swelling or discharge, and ensure your dog is recovering well from anesthesia before being discharged.
During this hospital stay, gentle physical therapy might even begin, such as passive range of motion exercises, under the guidance of a rehabilitation specialist. This early, controlled movement helps prevent stiffness and promotes healing, setting the stage for the more extensive rehabilitation that will follow at home. The goal is to send your Labrador home comfortable, stable, and ready for the next phase of their recovery.
Taking Your Labrador Home: First 24-48 Hours
Bringing your Labrador home after TPLO surgery can be a mix of relief and anxiety. You'll receive detailed discharge instructions covering medication schedules, incision care, activity restrictions, and signs to watch out for. It's incredibly important to adhere strictly to these instructions, especially concerning activity. Your Labrador will need strict confinement, often in a crate or a small, dog-proofed room, to prevent them from putting too much stress on the healing leg. Leash walks for potty breaks should be short, controlled, and performed slowly, ensuring your dog doesn't jump, run, or twist.
Administering pain medication precisely as prescribed is paramount. Even if your Labrador seems comfortable, maintaining consistent pain relief helps reduce inflammation and allows them to rest and heal properly. Watch the incision site daily for excessive redness, swelling, heat, or discharge – any of these could indicate an infection and warrant an immediate call to your vet. Remember, recovery from TPLO is a marathon, not a sprint, and the initial few days at home lay the groundwork for a successful return to activity. Thinking about what happens next, you might find it helpful to look into Recovery Time After Labrador Cruciate Surgery to set realistic expectations for the coming weeks and months. Pet insurance plans, such as those offered by Healthy Paws, can be incredibly beneficial during this intensive post-operative care period, helping to cover medication costs, follow-up vet visits, and rehabilitation expenses.
Disclaimer
This article is intended for informational purposes only and does not constitute medical advice. Always consult with a qualified veterinarian or veterinary specialist for any health concerns or before making any decisions about your Labrador's care. Surgical procedures carry inherent risks, and individual outcomes can vary.