Yard Repair After a Digging Labrador
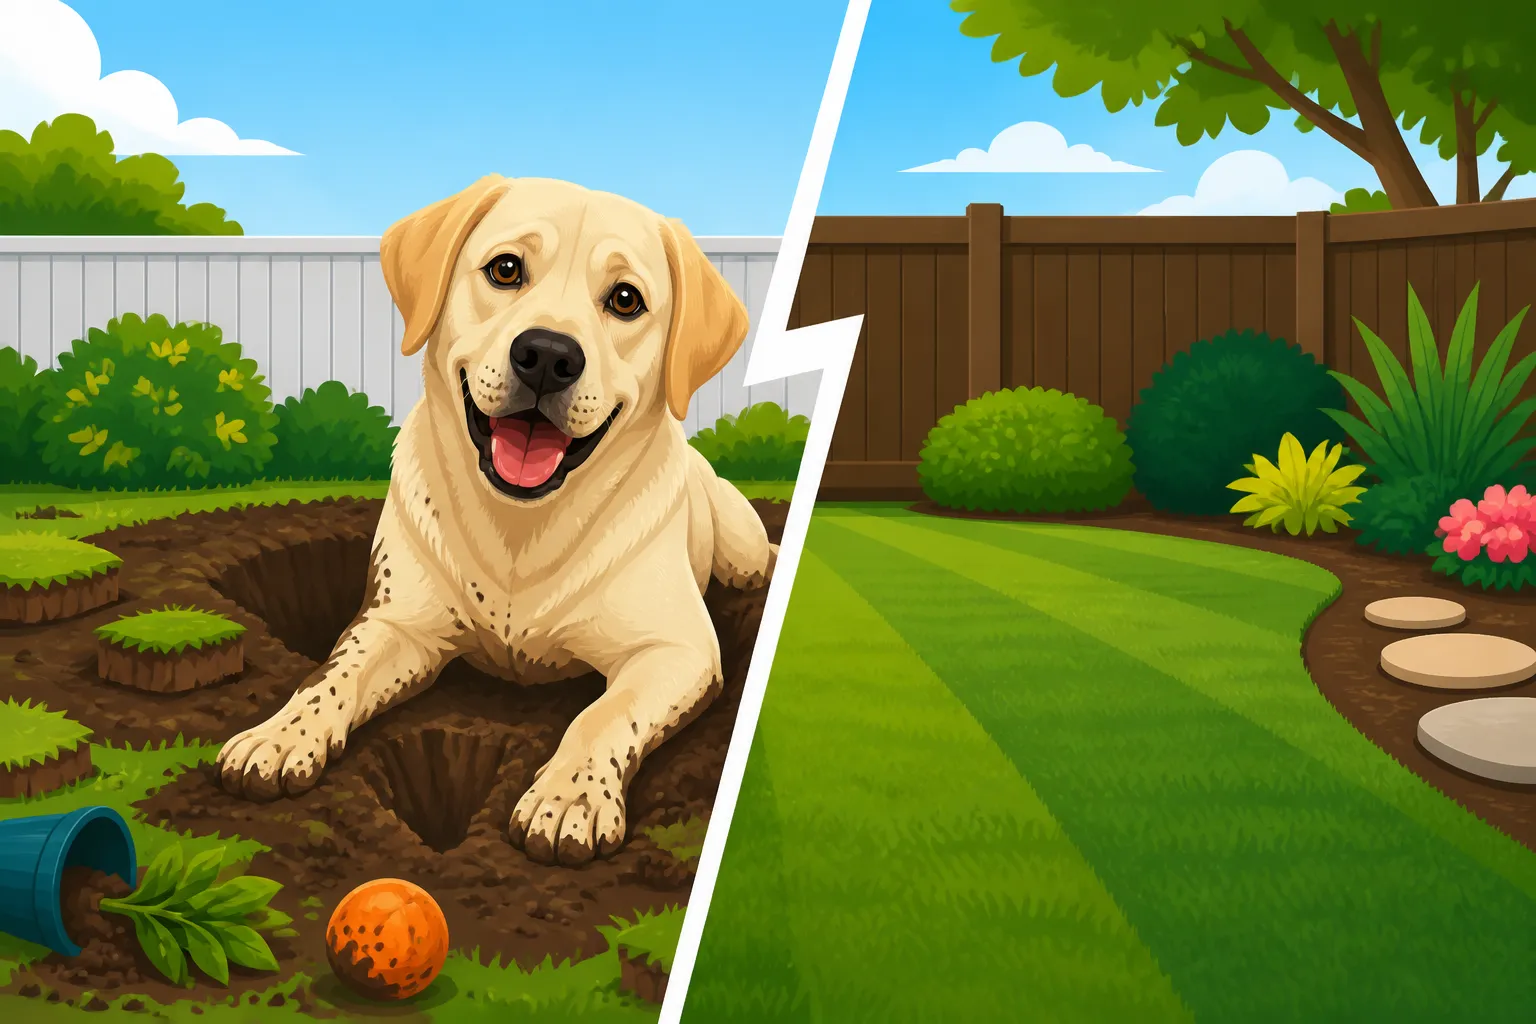
Oh, the joys of Labrador ownership! One minute you're admiring your beautiful, green lawn, and the next, it looks like a squadron of gophers held a convention in your backyard, courtesy of your beloved, dirt-covered Lab. It's a frustrating reality for many of us, facing crater-sized holes and torn-up turf, wondering how to restore our yards without resorting to constant surveillance. This guide is here to walk you through the practical steps to repair your yard after a Labrador's digging spree, offering solutions for both quick fixes and long-term prevention.
Understanding Why Your Labrador Digs
Before we even think about filling in those impressive excavations, it's really helpful to understand why your Labrador might be turning your yard into a lunar landscape. It's rarely out of spite, even though it can feel that way when you see the damage. More often, it's rooted in their instincts or unmet needs.
Instinctual Drives and Boredom
Labradors, at their core, are working dogs. They were bred for retrieving, for using their nose, and for having a job to do. When these powerful instincts aren't channeled, they find their own "work," and often that work involves digging. For some, it’s about hunting imaginary prey – perhaps a squirrel they spotted last week, or a scent trail from a critter that passed through. For others, especially in warmer climates, digging can be an attempt to create a cool spot to lie down, escaping the heat by reaching the cooler earth beneath the surface.
Beyond pure instinct, boredom is a huge factor. A Labrador with pent-up energy, who isn't getting enough physical activity or mental stimulation, will find ways to entertain themselves. And let's be honest, for a high-energy breed like a Lab, digging can be incredibly satisfying. It's a physical outlet, it engages their mind (figuring out how to move that dirt!), and it breaks the monotony of an otherwise uneventful day alone in the yard. This is why addressing the root cause, such as by ensuring your dog gets enough Exercise a Labrador Needs Each Day, is just as important as fixing the holes.
Anxiety and Escape Attempts
Sometimes, digging isn't just about fun or instinct; it can be a sign of underlying anxiety or an attempt to escape. If your Labrador is prone to separation anxiety, they might dig compulsively as a coping mechanism when you're away, trying to relieve stress or even to "dig their way out" to find you. You might see this accompanied by other signs like excessive barking, destructive chewing indoors, or pacing.
Similarly, an unfulfilled desire to explore or reach something on the other side of the fence can drive a Labrador to dig. They might smell another dog, a fascinating animal, or simply see an enticing patch of grass that looks greener on the other side. This kind of digging usually occurs along fence lines, creating tunnels for potential escape. If you suspect your Labrador is trying to tunnel out, you might need to reconsider your Fence Height That Holds a Labrador or reinforce the bottom of your existing fence.
Assessing the Damage and Preparing for Repair
Once you've had a moment to breathe and perhaps have hosed down your muddy culprit, it's time to get down to business. Repairing your yard isn't just about throwing some dirt back in; it's about setting the stage for healthy regrowth and preventing future craters.
Evaluating the Depth and Scope of Digging
Take a good look at the damage. Are they shallow scrapes, or are we talking about holes deep enough to swallow a small child? The depth and size of the holes will dictate your repair strategy. Small, shallow divots might just need a bit of topsoil and some grass seed. Deeper, wider craters will require more substantial work, potentially involving re-leveling the area and addressing soil compaction.
Consider the location too. Are the holes concentrated in one area, like along a fence line or near a favorite tree? This can offer clues about the motivation for the digging. If it's widespread and seemingly random, it might point more towards boredom or excess energy. If it's in a specific spot, you might consider creating a designated "digging zone" for your pup, which we'll discuss later under Giving a Labrador a Legal Place to Dig.
Gathering Your Repair Toolkit
You don't need a whole hardware store, but having the right tools on hand will make the job much smoother. Here’s a basic list of what you might need:
- Shovel: For moving soil, breaking up compacted earth, and shaping.
- Rake: To spread soil, level surfaces, and prepare seedbeds.
- Gloves: Protect your hands from dirt, rocks, and blisters.
- Wheelbarrow or Bucket: For transporting soil, compost, or gravel.
- Topsoil: Good quality, nutrient-rich soil to fill holes and provide a base for new growth.
- Compost or Organic Matter: To enrich the soil, especially if your yard's soil quality is poor.
- Grass Seed or Sod: Depending on the size of the repair and your patience. Choose a variety suitable for your climate and yard conditions (e.g., shade-tolerant, high-traffic).
- Watering Can or Hose with a Gentle Sprayer: Essential for proper seed germination and sod establishment.
- Tamper or Roller (optional but helpful): To compact soil lightly for a firm foundation.
- Small Netting or Chicken Wire (optional): To protect newly seeded areas from curious paws, at least until the grass takes root.
Thinking ahead about what you need can save you multiple trips to the garden center, giving you more time to spend with your happy (and hopefully, non-digging) Labrador.
Step-by-Step Yard Repair Guide
Now for the hands-on part. Let's get that yard looking presentable again! Remember, patience is key, both with the repair process and with your Lab's tendencies.
Filling and Leveling the Holes
This is where the real work begins. Don't just dump dirt in; approach it systematically.
- Clear Debris: First, remove any loose rocks, large clods of dirt, or hidden treasures your Labrador might have left behind (like that missing tennis ball from last month!). You want a clean slate to work with.
- Break Up Compacted Soil: If the sides or bottom of the hole are very compacted, use your shovel or a hand trowel to loosen the soil slightly. This helps with drainage and allows new roots to penetrate easily.
- Refill in Layers: Start by pushing any soil your Labrador excavated back into the hole. If there isn't enough, or if it's poor quality, start adding your fresh topsoil, mixed with some compost. Fill the hole in layers, tamping gently with your foot or a tamper after each layer. You want the soil to be firm but not rock-hard. Aim to slightly overfill the hole, as the soil will settle over time. You want the repaired area to be level with the surrounding turf, or just a tiny bit higher.
- Smooth and Rake: Once filled, use your rake to smooth out the area, making it blend seamlessly with the existing lawn. Break up any remaining clods and ensure a fine, even surface for planting.
A table comparing different repair materials can be quite helpful here:
| Repair Material | Best For | Pros | Cons |
|---|---|---|---|
| Topsoil | Shallow to deep holes, general leveling | Readily available, provides a good base | Can settle over time, may need nutrient amendment |
| Compost | Improving soil quality, adding nutrients | Enhances soil structure, slow-release nutrients | Can be more expensive than basic topsoil |
| Sand | Improving drainage in clay soils | Excellent for drainage | No nutritional value, can compact without organic matter |
| Peat Moss | Acidifying soil, improving water retention | Holds moisture well, lightens heavy soils | Can be dusty, not a primary nutrient source |
Seeding or Sodding for New Growth
Once the holes are filled and leveled, it’s time to bring back the green.
-
Grass Seed: This is often the most cost-effective option for smaller areas.
- Choose the Right Seed: Select a grass seed that matches your existing lawn or is well-suited to your local climate and sun exposure. For a high-traffic area with a Labrador, consider a durable blend.
- Spread Evenly: Sprinkle the grass seed evenly over the prepared soil. Follow the package instructions for the recommended coverage rate. You don't want it too thick (leads to weak seedlings) or too sparse (leads to patchy growth).
- Lightly Cover: Gently rake the seed into the top 1/4 inch of soil. This helps protect it from birds and helps with germination. You can also lightly sprinkle a thin layer of compost or peat moss over the seed.
- Water Gently: Crucial step! Keep the area consistently moist (not soggy) until the seeds germinate and the grass is established. This usually means light watering several times a day, especially in warm weather. A gentle sprayer attachment on your hose works wonders here.
- Protect: For really persistent diggers, you might need to temporarily fence off the area with some chicken wire or garden netting. Remember, your Lab will be naturally curious about new smells and disturbed earth.
-
Sod: For larger areas or if you want instant gratification, sod is a great choice.
- Prepare the Area: Ensure the soil is level and slightly moist.
- Lay Sod Promptly: Sod should be laid as soon as possible after delivery. Lay strips tightly together, staggering the seams like bricks.
- Press Down: Gently press or roll the sod to ensure good contact with the soil underneath. This is vital for root establishment.
- Water Heavily: Water the sod immediately and deeply. For the first few weeks, the sod needs constant moisture to fuse with your existing soil.
- Restrict Access: Keep your Labrador off the newly laid sod for at least 2-4 weeks, or until it has firmly rooted. This can be the trickiest part, but it's essential for success.
Post-Repair Care and Maintenance
Your work isn't done once the seed is down or the sod is laid. Ongoing care will ensure your efforts pay off.
- Consistent Watering: Continue to water regularly, especially during dry spells. New grass is delicate and can quickly dry out. As the grass matures, you can switch to less frequent but deeper watering.
- Fertilization (Optional): Once the new grass is established (a few weeks after seeding, or when sod has rooted), a light application of a balanced lawn fertilizer can encourage strong growth. Make sure to choose a pet-safe variety if your Labrador spends a lot of time on the lawn.
- Mowing: Don't mow newly seeded areas until the grass is at least 3-4 inches tall. For sod, wait about a week or two, or until you can tug on a piece and it feels firmly rooted. Always cut no more than one-third of the grass blade height at a time.
- Monitor for Pests: Keep an eye out for grubs or other lawn pests that might attract your Labrador to dig. Sometimes, a digging spree is actually your dog trying to get to something tasty underground.
Preventing Future Digging Disasters
Repairing the yard is one thing, but preventing a repeat performance is where the real victory lies. Addressing the underlying reasons for digging is paramount.
Increasing Exercise and Mental Stimulation
This is probably the most impactful strategy. A tired Lab is a good Lab!
- Daily Physical Outlets: Ensure your Labrador gets plenty of appropriate physical exercise every single day. This might mean long walks, intense games of fetch, swimming, or trips to a dog park. Remember, a quick potty break isn't exercise. For example, a young adult Labrador might need an hour or two of vigorous activity daily. If you're wondering how much, check out our guide on Exercise a Labrador Needs Each Day.
- Mental Challenges: Labradors are smart, and their minds need exercise too. Incorporate puzzle toys, treat-dispensing toys from brands like Chewy that challenge them to "work" for their food, or engage in training sessions that make them think. Scent work, where they have to find hidden treats or toys, is a fantastic way to tap into their natural retrieving and scenting abilities.
- Training and Jobs: Teach your Labrador new commands or tricks. Participate in dog sports like agility or obedience. Even giving them a "job" around the house, like carrying in the mail (with supervision, of course!), can make a big difference.
Creating a Designated Digging Area
Sometimes, it's easier to redirect than to eliminate a natural behavior.
- The "Sandpit" Solution: Create a specific spot in your yard where digging is allowed and even encouraged. This could be a small sandpit or a raised garden bed filled with loose soil or sand.
- Make it Appealing: Bury toys or treats in this area to make it more enticing than your pristine lawn. When you catch your Labrador digging elsewhere, gently redirect them to their designated spot. Praise and reward them lavishly when they dig there.
- Supervision is Key: Initially, you'll need to supervise closely to ensure they understand the "rules" of the digging zone. Over time, many Labradors learn that the special digging spot is the best place to unleash their inner earth-mover.
Addressing Anxiety and Behavioral Issues
If digging is linked to anxiety or escape attempts, you might need a more targeted approach.
- Managing Separation Anxiety: If your Labrador digs when you're away, it could be a sign of separation anxiety. This requires a multi-faceted approach, often involving desensitization exercises, creating a calming environment, and sometimes, even medication prescribed by a vet. Providing engaging toys or a long-lasting chew like those offered by Ollie when you leave can help, but it's not a cure-all for true anxiety. Consulting a professional dog trainer or a veterinary behaviorist can be invaluable.
- Fence Line Reinforcement: For escape artists, focus on reinforcing your fence. Bury chicken wire or a section of concrete blocks along the base of the fence, extending it inward at a 90-degree angle to create an "L" shape barrier underground. This makes it difficult for your Labrador to dig directly down and under. Consider adding visual barriers too, if your dog is digging to see what's on the other side.
- Professional Help: Don't hesitate to seek help from a certified professional dog trainer or behaviorist if you're struggling to curb persistent digging or suspect a deeper behavioral issue. They can provide tailored advice and strategies for your specific situation. They can also help if your dog is exhibiting other destructive behaviors, like constantly Replacing Baseboards a Labrador Chewed indoors.
Environmental Deterrents (Use with Caution)
Some deterrents can be used, but always prioritize your Labrador's safety and well-being.
- Physical Barriers: Placing large rocks, logs, or sections of chicken wire (buried just below the surface) in prime digging spots can make them less appealing. Be careful that these don't create new hazards.
- Unpleasant Scents (Temporary): Some dogs are deterred by strong, natural scents like citrus peels, cayenne pepper (use very sparingly and consider if it's safe for your dog), or commercially available pet-safe digging deterrents. These are often temporary fixes and need to be reapplied. Always ensure any product you use is non-toxic to your Labrador and other pets.
- Supervision and Redirection: Ultimately, the most effective deterrent is often direct supervision. When you're in the yard, actively watch your Labrador. The moment they start to dig in an inappropriate spot, interrupt them with a cheerful "Nope!" and immediately redirect them to an appropriate activity or their designated digging area. This consistent approach, much like Labrador Puppy Mouthing and How to Redirect It, teaches them what is and isn't acceptable.
Dealing with the Costs of Repair and Prevention
Let's be real, owning a Labrador comes with a certain budget, and yard repair can add to it. Planning for these potential costs can save you stress down the line.
Budgeting for Materials
The cost of repairing your yard will vary widely based on the extent of the damage, the size of your yard, and your choice of materials.
- Grass Seed vs. Sod: Grass seed is significantly cheaper, but requires more time and consistent care. Sod provides an instant lawn but is a larger upfront investment. If you have extensive damage, it might be worth considering a mix, or prioritizing sod in high-visibility areas. You can often find good deals on grass seed at local nurseries or pet stores like those affiliated with Chewy.
- Soil Amendments: Topsoil and compost are generally affordable, but if you need large quantities, the cost can add up. Buying in bulk from a local landscaping supply company can be more economical than bagged products from big box stores.
- Tools: Most basic tools (shovel, rake, watering can) are one-time purchases that will serve you for years. If you don't have them, consider them an investment in your home maintenance kit.
Investing in Prevention
The best way to save on yard repair costs is to prevent the digging in the first place. This means investing in your Labrador's well-being.
- Quality Food: A well-fed Labrador has a strong foundation for energy and health. While perhaps not directly related to digging, ensuring your dog gets appropriate nutrition can impact their overall demeanor and energy levels. Brands like Ollie offer tailored meal plans that can contribute to overall health.
- Enrichment Toys: A good supply of durable chew toys and puzzle toys is an essential investment. Look for toys specifically designed for strong chewers. Think about the guides that discuss Chew Toys That Survive a Labrador. These might seem like an extra expense, but they can be far cheaper than replacing sections of your lawn or chewed-up furniture.
- Training Classes: If your Labrador's digging stems from boredom, lack of training, or anxiety, enrolling in obedience classes or consulting a professional trainer can be a smart long-term investment. This addresses the root cause and provides you with tools to manage their behavior effectively. This applies to a range of behaviors, whether it's Digging Behavior in Labrador Retrievers or learning Crate Training a Labrador Puppy for safe denning.
- Pet Insurance: While pet insurance won't cover yard repair, it's worth considering for unexpected vet bills that might arise from your Labrador ingesting something while digging, or injuries sustained during an escape attempt. Companies like Healthy Paws can offer peace of mind for the bigger health picture. An emergency fund or pet insurance is always a wise choice for any Labrador owner.
Repairing a yard after a Labrador's digging spree can feel like an uphill battle, but with the right approach and a commitment to understanding your dog's needs, you can reclaim your lawn and foster a happier, less destructive companion. It's all about patience, consistency, and a little bit of elbow grease!
Disclaimer
This article is for general informational purposes only and does not constitute professional advice. Laws, prices and regulations vary by location and change over time. Consult a qualified professional for guidance on your specific situation.